An ironsmith shapes iron into objects of strength and beauty — tools, fittings, things meant to last. IconSmith does the same with the application icons that populate your Mac.
What IconSmith Lets You Do
Your Finder is your workspace. IconSmith puts you back in control of what your application icons look like:
Lock your appearance. Pin an application icon permanently to a specific look, so that switching macOS between Default, Dark, Clear or Tinted styles — or updating the application — does not silently change what you see in Finder.
Preserve the past. Extract the beloved icon from a legacy version of an application and keep it — even as the app updates itself beyond recognition.
Bring the future back. Use a modern icon on an older system that never received the visual update.
Restore consistency. Build a visual identity in your Finder that holds across operating system versions, application updates, and time itself.
Something Was Lost
There was a time when every icon on your Mac was a little masterpiece, optimized to look crisp and clear at any resolution.
The Address Book bound in leather. The iCal calendar with its torn page. The blue Mail envelope sealed in red wax. The wooden shelf of iTunes. Each one was a miniature painting, crafted with care, designed not merely to identify a function — but to feel like the thing it represented. You could almost smell the leather. You could almost hear the page tear.
Then came the squircle. A rounded square. A gradient. A simpler image centered inside.
Then came Tahoe. Uniform Icons. Consistent across every application, every platform, every screen. Efficient, certainly. Scalable, undeniably.
But something retreated with it — the sharpness, the individual character, the human scale, the quiet joy of recognising an application from across the room by the texture of its icon.
IconSmith was made for those who remember. And for those who still care.
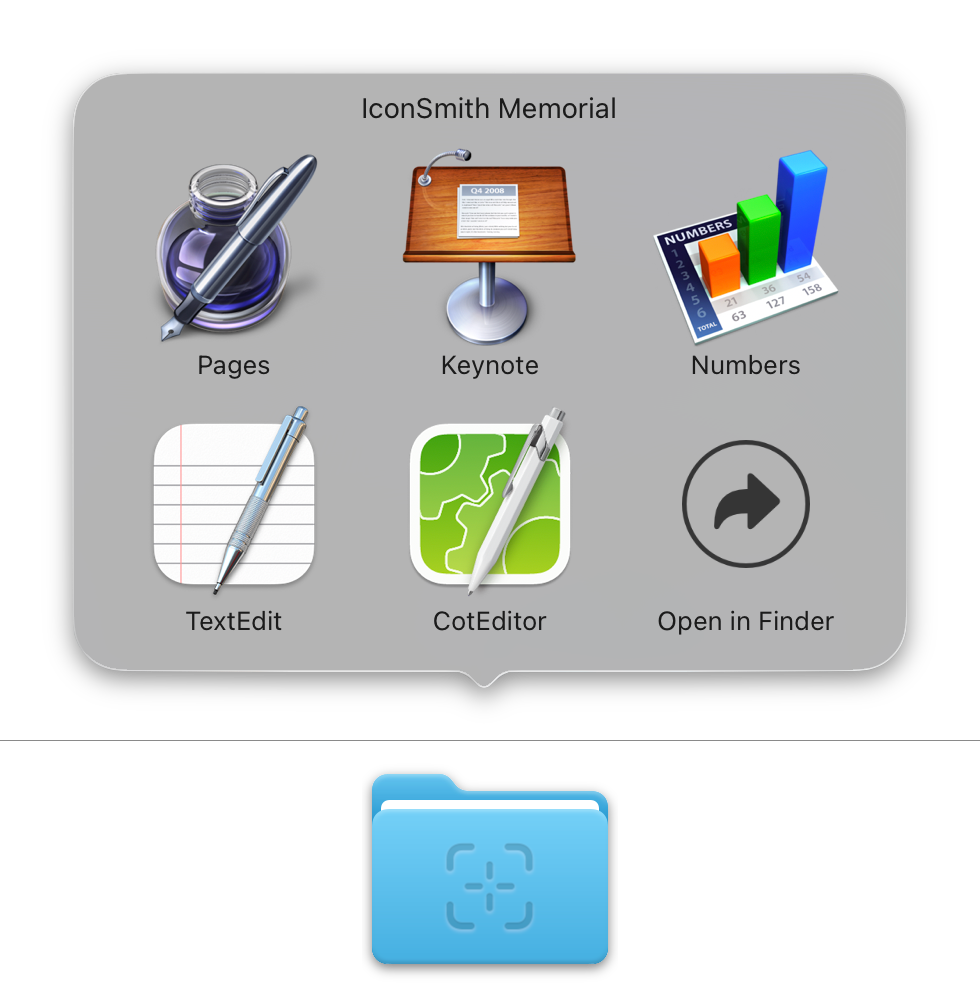
The Memorial Folder
You can save your documents .is created by IconSmith wherever you like, but the special folder IconSmith Memorial is probably where you will keep your collection of .is documents. The name is intentional.
It is a memorial to the icons that came before — to the hours a designer once spent on a single 512 × 512 image in hight resolution, nudging highlights, deepening shadows, placing a reflection just so. Those designers, and those icons, deserve to be remembered. Drop your saved icons there. Open the folder sometimes. Let them be seen.
The folder is created automatically the first time you launch IconSmith, and you can open it at any time from Window > Reveal IconSmith Memorial.
Tip
You can also drag the IconSmith Memorial Folder Icon into your Dock… if you choose to display it as a folder, and to view content as a grid, it can be used as a nice application launcher.
This screenshot was done in Tahoe 26.3. Unfortunately, some versions of the operating system doen’t display icons in this grid as they appear in their Finder folders, but simply as documents. This issue has been reported to Apple (FB22512946).
However, the icon’s appearance remains unchanged when an IconSmith document is dragged directly into the Dock on the right side.
This is the first public version.
It runs natively on Apple Silicon and older Intel-based architectures.
This application allows using the Tahoe icons back to version Ventura (macOS 13.5)
Conversely, it allows you to use icons from older systems (even the very first ones) on Tahoe.
Getting Started
Getting Started with IconSmith
IconSmith lets you extract the icon from any macOS application and export it in several formats — as a portable document, an icon file, or a complete set of images.
The portable document is the default format: opening it with a double clic will open the original application.
Step 1 — Load the original app
You can load any application into IconSmith in three ways:
Drag and drop — Drag an application from Finder directly onto the IconSmith window.
Click — Click anywhere in the drop zone (without dragging) to open a dialog box where you can select an application.
Choose — Choose File > Open (⌘O), to open a file browser.
After loading an original app, IconSmith displays its icon in the centre of the window and shows a colour-category label beneath the preview, matching the current system appearance.
Tip
You can drop applications from anywhere — /Applications, /System/Applications, a USB drive, or a disk image.
⚠️ Location
If you have multiple versions of the app, the version located at the spot from which the app was choosed will be saved.
Step 2 — Choose the Desired Appearance
Once this is done, you may want to change the definitive appearance. This can be done in three ways.
Using the ‘Appearance’ System Settings pane — The icon and the label below are updated accordingly.
Loading an older version of the same application — The icon of the older version of the application is now linked to the initially dropped application. The label below shows the version being used.
Loading another .is document — This document may come from any source (for example, it may have been sent by a friend), but it must match the original app, regardless of its version. IconSmith responds as described above.
Step 3 — Choose an Output Format
Use the three buttons in the toolbar to select what you want to create:
Button
Format
What you get
Default ★
An .is document — a launcher that opens the original app and displays the icon you chose, permanently, regardless of any OS appearance change.
File
The raw icon as an .icns file.
Folder
An .iconset folder with every standard .png size.
★ Recommended format
The default format (.is document) is the heart of IconSmith. Double-clicking an .is file launches the original application — and the icon you saved into it is the one you will always see in Finder, no matter how many times the app updates, and regardless of whether you switch macOS between Default, Dark, Clear or Tinted Style. Your choice is permanent and yours alone.
Your format selection is remembered between sessions.
Step 4 — Export the Icon
Once you have selected an appearance and a format, choose one of these methods to save:
Drag out — Drag the icon preview out of the window and drop it into any Finder folder.
File > Save (⌘S) — Opens a save panel where you choose the destination folder.
File > Share — Share via AirDrop, Messages, or any other system share extension.
⚠️ Privacy
When you share a .is file, the information identifying the location of the application originally used to create the file (the one that launches on your computer when you open the document) is not saved. This is because it may contain information specific to you.
The person who opens this file will launch the corresponding application on their computer. If this application cannot be found on their machine, an alert will display an error message notifying them.
Clearing the Current App
To delete the selected app or the added icon, start over or go back:
Press the Delete key
Choose Edit > Delete
Click the small ⨂ in front of the colour-category label below the icon preview
Drag the icon displayed onto the trash can
You can also choose a completely different application right away. In fact, an application that is not compatible with the one originally choosen will replace it.
IconSmith supports three output formats, each with a primary and an alternate mode selectable with the ⌥ Option key.
The Three Formats
Toolbar Button
Format
Primary Output
Option-Key Output
Default
.is document
.alias file
File
.icns binary
.png image
Folder
.iconset folder
.app minimal app
Each format has its pros and cons.
Selecting a Format
Click one of the three buttons in the toolbar at the top of the window. The active format is highlighted. IconSmith remembers your choice between sessions.
Primary vs Alternate Output
Drag the icon preview out of the window to export. To switch to the alternate output, hold ⌥ Optionbefore you start the drag. The drag image changes to reflect which output will be created.
Tip
You can also use File > Save (⌘S) to save to a folder via a dialog, or File > Share to share the output via the system sharing sheet.
Which Format Should I Use?
Goal
Recommended format
Keep the icon linked to its app, shareable with others
Default → .is document
Generate a classical alias, with the current icon
Default → .alias document (with Option)
Apply the icon to a folder or another app in Finder
The default format creates a Finder-compatible file that points back to the original application — and carries the extracted icon embedded within it.
IconSmith Documents (.is)
The default output is an IconSmith document with the .is extension. It bundles together:
The embedded .icns icon data (base64-encoded)
A bookmark — a macOS reference that continues to work even if the application is moved on the drive
The original application’s bundle identifier, display name, version, and copyright notice
A creation timestamp (ISO 8601)
A SHA-256 integrity checksum that protects the document from tampering
Creating an IconSmith document
Select the default format in the toolbar (first button).
Drag the icon preview out of the window and drop it into any Finder folder, or choose File > Save (⌘S), or choose File > Share.
What happens when you open an IconSmith document
IconSmith verifies the file’s integrity using its SHA-256 checksum.
The original application is located using the stored bookmark.
If necessary, the custom icon is applied to the document file itself (visible in the Finder).
The original application launches.
Tip
IconSmith documents are the recommended format for storing and sharing custom icons, because they keep the icon and its target together in a single portable file. Double-clicking the document launches the application, after restoring the icon’s display if necessary. The Finder may ask for your permission to restore it, just once.
Classic Finder Alias .alias (Option Key)
Hold ⌥ Option while dragging to create a standard macOS Finder alias file instead. The alias points to the original application and has the extracted icon applied as a custom Finder icon.
Use a classic Finder alias when you want a simple shortcut without the full IconSmith document format.
The advantage of an alias is that you can drag a document onto it so that the application opens the document directly.
Unfortunately, on Tahoe, the alias will loose the wanted appearance or icon as soon as it needs to be updated by the Finder. The same unexpected behaviour occurs when the alias is dropped in the Dock. Apple has been informed of these bugs in Tahoe (FB22323346 and FB22022729).
The IconSmith Memorial Folder
IconSmith maintains a special folder at ~/Library/IconSmith Memorial/ where you can keep your .is documents organised. Choose IconSmith > Reveal IconSmith Memorial to open this folder in Finder.
The File format extracts the icon from an application and saves it as a standalone file that you can use anywhere on your Mac.
.icns Format (Default)
Dragging with the File format selected creates an .icns file — the native macOS icon format used by applications. An .icns file contains multiple resolutions of the icon (from 16 × 16 to 1024 × 1024 pixels) packed into a a single binary container that can be viewed using the Preview app.
Common uses for .icns files:
Apply to an app — Select the app in the Finder, choose File > Get Info, then drag the .icns file onto the small icon in the upper-left corner of the Get Info window.
This is the best way to set the desired icon for an app. It will be updated in the Dock, in the “About...” window, and so on. However, it may be lost during an update.
Apply to another Finder item, File or Folder — Same procedure in Get Info.
.png Format (Option Key)
Hold ⌥ Option while dragging to export a .png image instead. The .png is rendered at 1024 × 1024 pixels at 2× scale (equivalent to a 512 pt @2x retina image), providing a high-quality, lossless result with full alpha transparency.
Common uses for .png files:
Sharing the icon image with others
Importing into design tools (Sketch, Figma, Pixelmator, etc.)
Including the icon in documents or presentations
Using as a source image in image-editing workflows
File Naming
The exported file is named after the application’s display name. For example:
Safari.icns
Xcode.png
Note
The file extension may be hidden in Finder by default, consistent with standard macOS behaviour. The extension is always present on disk.
The Folder format exports either a complete set of icon images at all standard sizes, or a minimal application that launches the original app.
Folder with icon set .iconset (Default)
Dragging with the Folder format creates an .iconset folder containing .png images at every standard macOS icon size:
File name
Pixel size
Usage
icon_16x16.png
16 × 16
Small icon @1x
icon_16x16@2x.png
32 × 32
Small icon @2x (Retina)
icon_32x32.png
32 × 32
Medium icon @1x
icon_32x32@2x.png
64 × 64
Medium icon @2x (Retina)
icon_128x128.png
128 × 128
Large icon @1x
icon_128x128@2x.png
256 × 256
Large icon @2x (Retina)
icon_256x256.png
256 × 256
Full-size icon @1x
icon_256x256@2x.png
512 × 512
Full-size icon @2x (Retina)
icon_512x512.png
512 × 512
App Store / high-res @1x
icon_512x512@2x.png
1024 × 1024
App Store / high-res @2x (Retina)
Using with Xcode
Drag the .iconset folder directly into your Xcode project’s asset catalog. Xcode automatically imports all sizes.
Converting to .icns
You can convert an .iconset folder to an .icns file using Terminal:
iconutil -c icns YourApp.iconset
Minimal application .app (Option Key) — For advanced users only
Hold ⌥ Option while dragging to create an .app wrapper — a minimal application that, when double-clicked in Finder, launches the original application. The wrapper displays the extracted icon.
You must use the “Terminal” app
After creating the app wrapper, a Terminal command is automatically copied to your clipboard. You must run it to finish the setup:
Open Terminal (in Applications > Utilities, or search in Spotlight).
Paste the command with ⌘V and press Return.
The command performs two tasks:
Removes the macOS quarantine flag
Sets the executable permission on the wrapper’s binary
Important
Without running the Terminal command, the app wrapper will not launch because macOS Gatekeeper will block it. For security reasons, this action may sometimes trigger a confirmation prompt from the system. Here, this command is harmless — it only affects the newly created wrapper file. Its binary is officially signed by the certificate ‘Developer ID Application: Frederic Blondiau (6ZRRD98W8X)’.
The main advantage of this format is that it can be used anywhere as an alternative to the original application, for example on the desktop, in a Finder window or in the Dock. Any document dropped on it is forwarded to the original application, which tries to open it.
An IconSmith document (.is) is a portable file that bundles a custom icon together with a reference to its associated application.
Just double-click it to launch the application. If necessary, the icon for this document will be updated.
Integrity Verification
Every IconSmith document has an embedded SHA-256 checksum. When you open a document, IconSmith verifies this checksum before doing anything else.
If the document fails verification, you see this alert:
Alert
"[filename] is damaged and can’t be opened. You should move it to the Trash."
This means the file was modified after it was created — either by a transmission error, by another application, or deliberately. Move the document to the Trash and recreate it from the original application.
Security
Feel free to open .is files from various sources. The integrity check confirms that the file has not been tampered with.
If the Linked Application Is Missing
When you open a document, IconSmith looks for the linked application in this order:
Follows the stored bookmark (works even if the app was moved).
Performs a system search by bundle ID if the bookmark is outdated or if the document was shared.
If the application cannot be found at all, you see an alert. Reinstall or relocate the application and try again, or drag the app back onto the IconSmith window to create a fresh document.
Organising Your Documents
Use the IconSmith Memorial folder to keep your .is documents in one place. Open it from the IconSmith menu > Reveal IconSmith Memorial.
The folder is located at ~/Library/IconSmith Memorial/ and is created automatically the first time you launch IconSmith.
When you drop an app onto IconSmith, it doesn’t use the icon from the Finder’s Info window; instead, it uses the icon from the current style, as displayed on the desktop and in Finder windows. This style (Default, Dark, Transparent), along with any selected color (Tinted), appears below the icon preview.
How does This Work ?
IconSmith performs the following steps:
Resamples its own icon to a 40 × 40 pixel grid and computes the average colour.
Converts the average colour to the CIELAB colour space, which models human colour perception rather than raw RGB values.
Calculates the ΔE76 distance between its icon’s colour and each of the 22 reference colours.
Assigns the category whose reference colour is closest (smallest ΔE76).
This perceptual approach ensures the best possible detection of the style used by the system when the Finder displays its icons.
The 22 Colour Categories
Each colour family has a Light and a Dark variant, indicating whether the icon’s dominant tone is lighter or darker:
Family
Light variant
Dark variant
Default
Default
Dark
Neutral
Clear (Light)
Clear (Dark)
Blue
Blue (Light)
Blue (Dark)
Purple
Purple (Light)
Purple (Dark)
Pink
Pink (Light)
Pink (Dark)
Red
Red (Light)
Red (Dark)
Orange
Orange (Light)
Orange (Dark)
Yellow
Yellow (Light)
Yellow (Dark)
Green
Green (Light)
Green (Dark)
Graphite
Graphite (Light)
Graphite (Dark)
Other
Other Light
Other Dark
Appearance-Aware Preview
The colour category label updates in real time when you switch between Default, Dark, Clear or Tinted Style.
When IconSmith is in the background, it continues monitoring for appearance and style changes and refreshes the preview.
Using the Colour Label
The colour category label below the icon preview serves two purposes:
It tells you which category the icon belongs to.
Clicking the small ⨂ icon next to the colored category label below the icon preview removes the current app from the window and lets you start over.
The most powerful uses of IconSmith come from combining two drops — loading an application first, then supplementing it with a second source to override the icon.
Using an Icon from an Older Version of the Same App
You can load the current installed version of an application, then replace its icon with the one from any other version you have on disk — an archived copy, an old backup, a version you kept precisely because it had the icon you preferred.
How to do it
Drop the application from its current location (for example, /Applications/TextEdit.app) onto the IconSmith window. The current icon is displayed.
Drop another version of the same application — from your backup drive, an archive folder, or anywhere else it lives — that contains the icon you want to use instead.
The icon in the window updates to the one from the version you just dropped. A label beneath the preview tells you which version that icon came from.
Export using your chosen output format. The result carries the old icon applied to the new target.
Important
Both drops must be the same application — that is, they must share the same bundle identifier (for example, com.apple.TextEdit). If you drop a different application, it replaces the loaded app entirely rather than updating only the icon.
This technique is especially useful when:
An application update replaced a carefully crafted icon with a flat squircle redesign.
You want to pin an older version’s icon to the current installation permanently.
You have an archive of old application bundles from previous macOS versions.
👉 Tip
If you drag the same original app a second time, it is very likely that the icon that appears will be the one used by that same app in previous versions of the operating system.
This works with applications from the App Store or from external sources, but not with those that come pre-installed with the system — they only contain icons for the system they are shipping with.
Loading an Icon from an IconSmith Document
An .is document is a portable icon container. If someone shares a document with you — perhaps one containing the icon for a long-discontinued version of an app — you can use it directly: it will launch the corresponding app on your system.
Important
If you have multiple versions of this application, you can drag the document into the IconSmith window after first placing the desired version of the application there.
How to do it
Drop the application you want to work with onto the IconSmith window. Its current icon is displayed.
Now open the .is document: drag it onto the window, or choose File > Open (⌘O) and select it.
If the document’s bundle identifier matches the application already loaded, the icon from the document is used in the preview. The application’s target and all its metadata are preserved — only the icon changes.
Export normally with your chosen format.
Tip
If the bundle identifiers do not match — for example, if the document was created for a different application — the document simply opens as a standalone item, replacing what was loaded. No harm is done; just reload your original app and try again.
Why this matters
IconSmith documents can be shared between users, posted online, or stored in your own archive. They carry no external dependency — the icon data is self-contained. This means:
A friend can share the original TextEdit icon from macOS 10.9, and you can apply it to your copy of TextEdit without ever having that old system.
You can build a personal library of historical icons in your IconSmith Memorial folder and use them on any machine.
Communities of users can curate and distribute collections of archival icons for the applications they care about.
Make sure you are dragging an actual application bundle (a .app file) directly from Finder. IconSmith cannot extract icons from other file types.
If the icon is missing even for a valid app, the application’s bundle may not include a standard icon resource. This is rare but can happen with developer builds or command-line tools packaged as .app bundles.
I dropped an app but only see the default icon
Some apps store their icon under an unusual resource name. IconSmith reads CFBundleIconName and CFBundleIconFile from the app’s Info.plist, then falls back to the Finder thumbnail. If neither yields a recognisable icon, the system default app icon is displayed.
I can’t save to a particular folder
Before saving, IconSmith checks that the destination is writable. Common reasons a folder may not be writable:
You do not have write permission (check in Finder > Get Info).
The volume is mounted read-only (e.g., a disk image or a locked external drive).
The path is protected by System Integrity Protection (SIP): /System/, /usr/, /bin/, or /sbin/.
Choose a writable destination such as your Desktop, Downloads, or Documents folder.
The document shows "damaged and can’t be opened"
This alert means the .is document has failed its SHA-256 integrity check — the file does not match the checksum recorded when it was created. Possible causes:
The file was corrupted during a network transfer or copy.
The file was modified by another application.
The file was received from an untrusted source and may have been altered.
Move the document to the Trash and create a new one by dropping the application onto IconSmith again.
The linked application can’t be found
When you open an .is document, IconSmith tries to locate the linked application. If it shows an alert that the application is missing:
Make sure the application is installed. Reinstall it if necessary.
If you moved the application to a new location, the bookmark should still resolve correctly — but if it does not, drop the app onto IconSmith again to create a fresh document.
The app wrapper won’t launch (Gatekeeper blocks it)
When you export an .app wrapper using the Folder output with ⌥ Option, a Terminal command is automatically copied to your clipboard. You must run this command before the wrapper will launch:
Open Terminal (Applications > Utilities).
Paste with ⌘V and press Return.
The command removes the quarantine attribute and sets the executable flag. Without it, macOS Gatekeeper will prevent the wrapper from running.
The icon looks wrong after switching between Default, Dark, Clear or Tinted Style
IconSmith monitors system appearance changes in the background and updates the preview automatically. If the preview looks incorrect after a mode switch, click anywhere in the drop area to force a refresh.
The icons do not appear correctly after dragging the Memorial folder to the Dock.
While holding down the ⌥ Option key, make sure the following options are selected: Show as folder and View contents as a grid.
The help book doesn’t appear in the Help menu
After installing a new build, macOS helpd may cache the previous help book. Clear the cache with the following Terminal command, then relaunch IconSmith:
rm -rf ~/Library/Caches/com.apple.helpd
How do I send feedback or report a bug?
Choose Help > Send Feedback to open a pre-addressed email to the developer, or visit the IconSmith website via Help > Visit IconSmith Website.